Check your workspace and optional settings
After migration, check your setup and decide whether to add extra questions, evidence instructions or reviewers.
Last updated 6 days ago
Use this guide after Brownie Points confirms that your workspace is ready. Your Localities, indicators and reporting configuration have been imported from the onboarding pack.
1. Accept your invitation and check the setup
Open your personal invitation, check your details and choose a password. Sign in to Quicksticks. If you have access to more than one workspace, choose the correct SIP workspace.
Check the Localities, partner links, active states, indicators and people. Tell Brownie Points if something is missing or incorrect rather than adding a duplicate.
2. Decide on optional settings
You do not need extra settings to begin tracking. Before collectors start, you may want to add:
- Clear evidence instructions, such as what a photo or document should show.
- Extra questions to explain the result.
- Locality targets, where your SIP has agreed them.
- Worksite or partner reviewers, where needed.
Keep the imported official reporting frequency, calculation rules and Kwantu links unless a change has been agreed with Brownie Points. Agree your capture and review dates with your team; contact us if you need to enter a previous month’s figures after month-end.
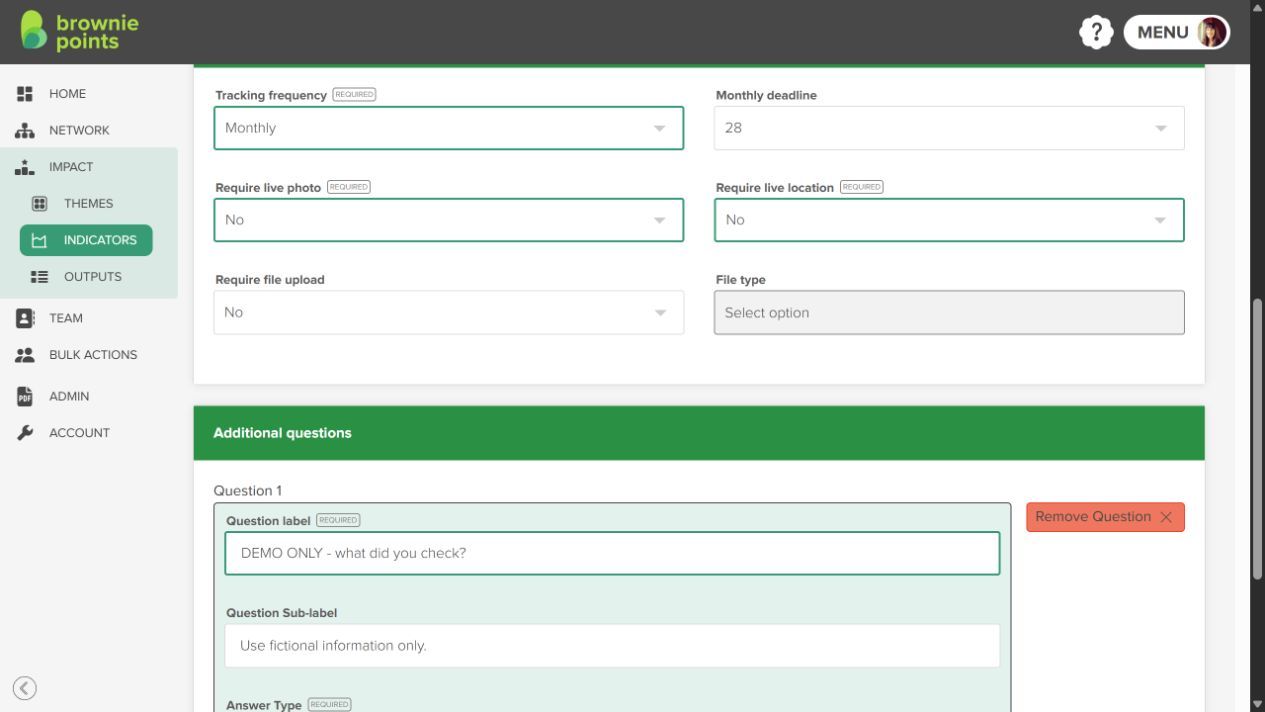
Open Impact → Indicators and the relevant indicator’s settings. Save changes with Update indicator, then reopen it.
You should now see the saved frequency, deadline and evidence settings.
Add an extra question to an unused indicator
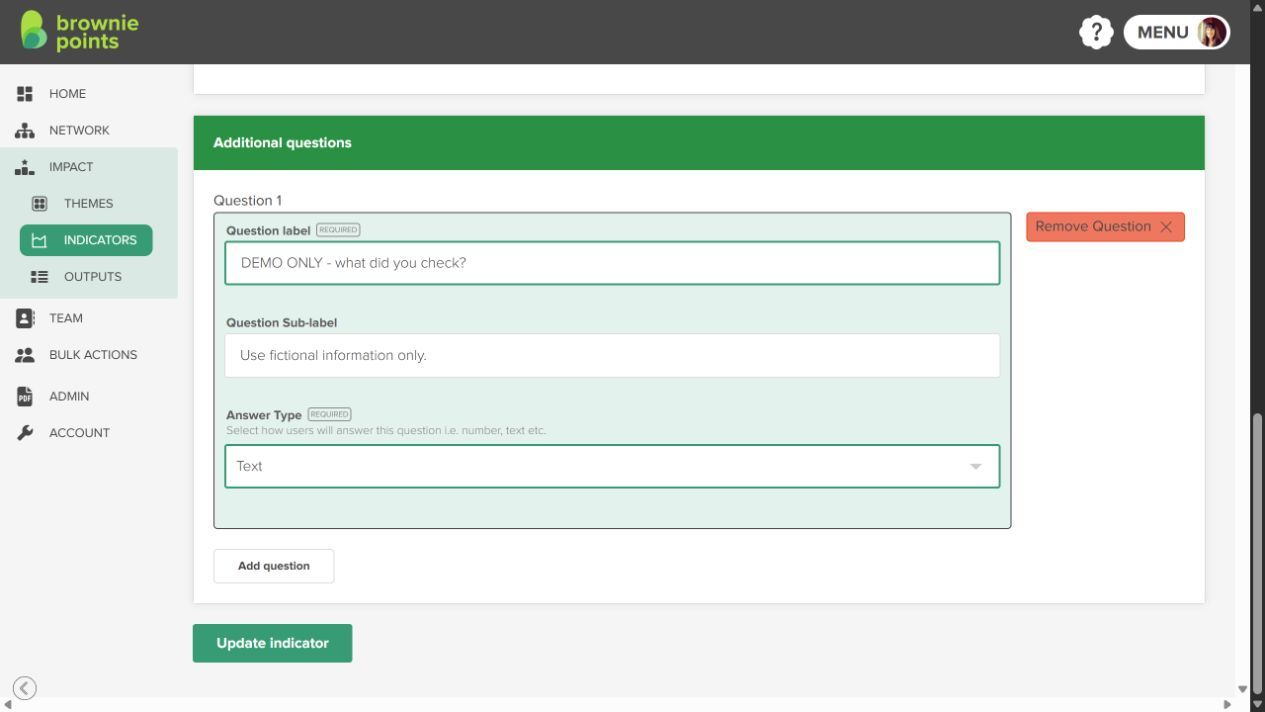
- Open the indicator settings and choose Add question.
- Enter a clear question label and optional short guidance in Question Sub-label.
- Choose an Answer Type, such as Text.
- Click Update indicator, then reopen it.
You should now see your saved question, guidance and answer type.
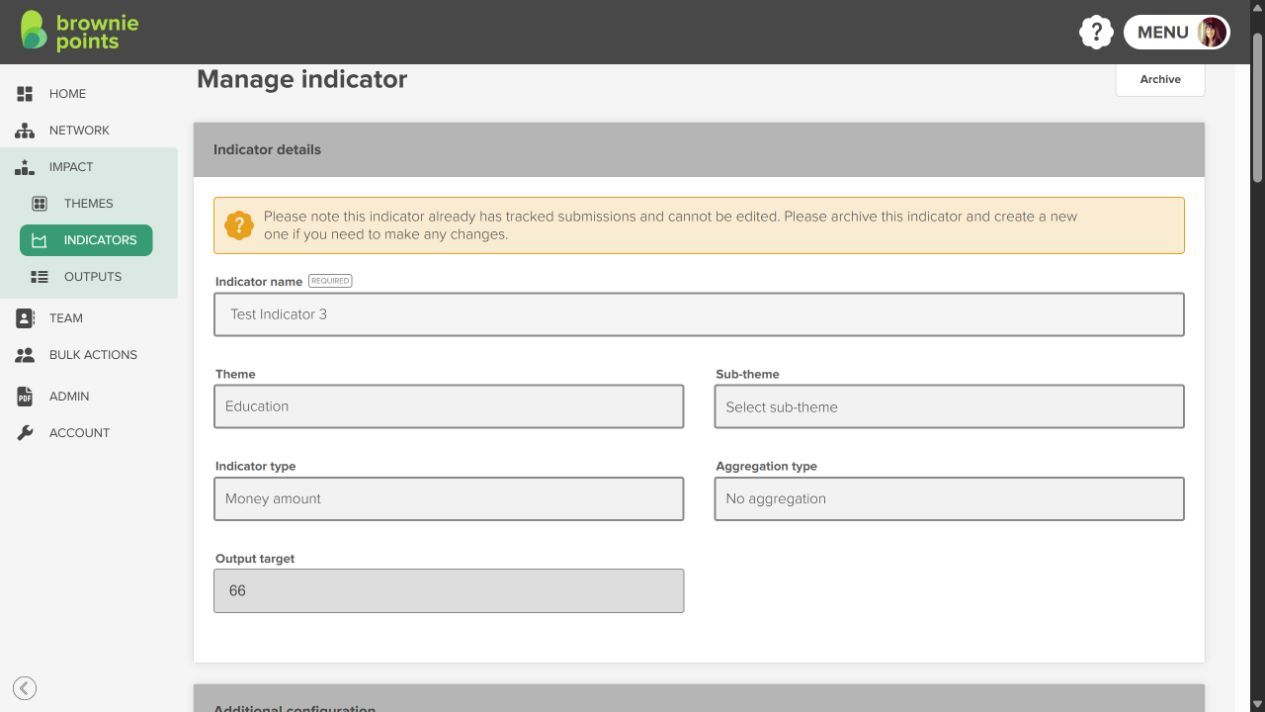
Why can I not edit an indicator?
An indicator with existing submissions is locked against changes. You should now see a notice above its details and disabled settings. This protects the meaning of figures already collected. Contact Brownie Points before archiving or replacing an indicator linked to your official reporting setup.
For a new indicator with no submissions, open Impact → Indicators, select its settings, make the change and choose Update indicator. Reopen it and check the saved settings before your team starts collecting.
3. Invite the team and practise
Follow Invite collectors and reviewers. Check that each person can see their assigned Localities and agree who will collect and review each indicator.
Label practice records TEST and send Brownie Points their Locality, indicator and reporting period for cleanup. Wait for removal confirmation before live reporting. A TEST label does not remove a record from totals.
Was this helpful?
Still need help? Ask the team