Invite collectors and reviewers
Send invitations to imported collectors and choose the correct reviewer role and locality, partner or workspace.
Last updated 5 days ago
Use this guide after your workspace has been set up. People imported during migration may already have access assigned, but still need their invitation email.
Watch the short tutorials
Choose the video you need. Each takes less than a minute and a half. Pause whenever you need to follow a step.
Invite data collectors — 1:13
Send invitations to collectors already listed, or add a new collector to the correct locality.
Invite reviewers — 1:17
Choose a locality, partner or SIP reviewer and check their access.
Play the videos here, with the sound on. They use a demonstration workspace. Follow the steps in your own SIP workspace. The written instructions are below.
First: invite collectors already on your list
- Sign in as a workspace admin and open Team → Admins. This list also includes data collectors.
- Search for the person’s name or email. Check their email and assigned role before sending anything. Do not add the same person again.
- Look at Onboarded. A green tick means they have completed onboarding. They can use their existing email and password. A red cross means they have not completed it.
- For a person with a red cross, use the envelope button at the right of their row to send their invitation. Ask them to check their inbox and spam folder.
- Ask them to follow their own link, check their details and choose a password. Then ask them to sign in and check their assigned localities in Track outputs.
You should now see a green tick under Onboarded once the person has completed onboarding and you refresh the list. A tick confirms onboarding; also check that they can open the correct locality.
If they already have a green tick but cannot remember their password, they can use Forgot password on the sign-in page. If the email is wrong, the person is missing or the invitation does not arrive, contact your workspace admin or Brownie Points before creating another account.
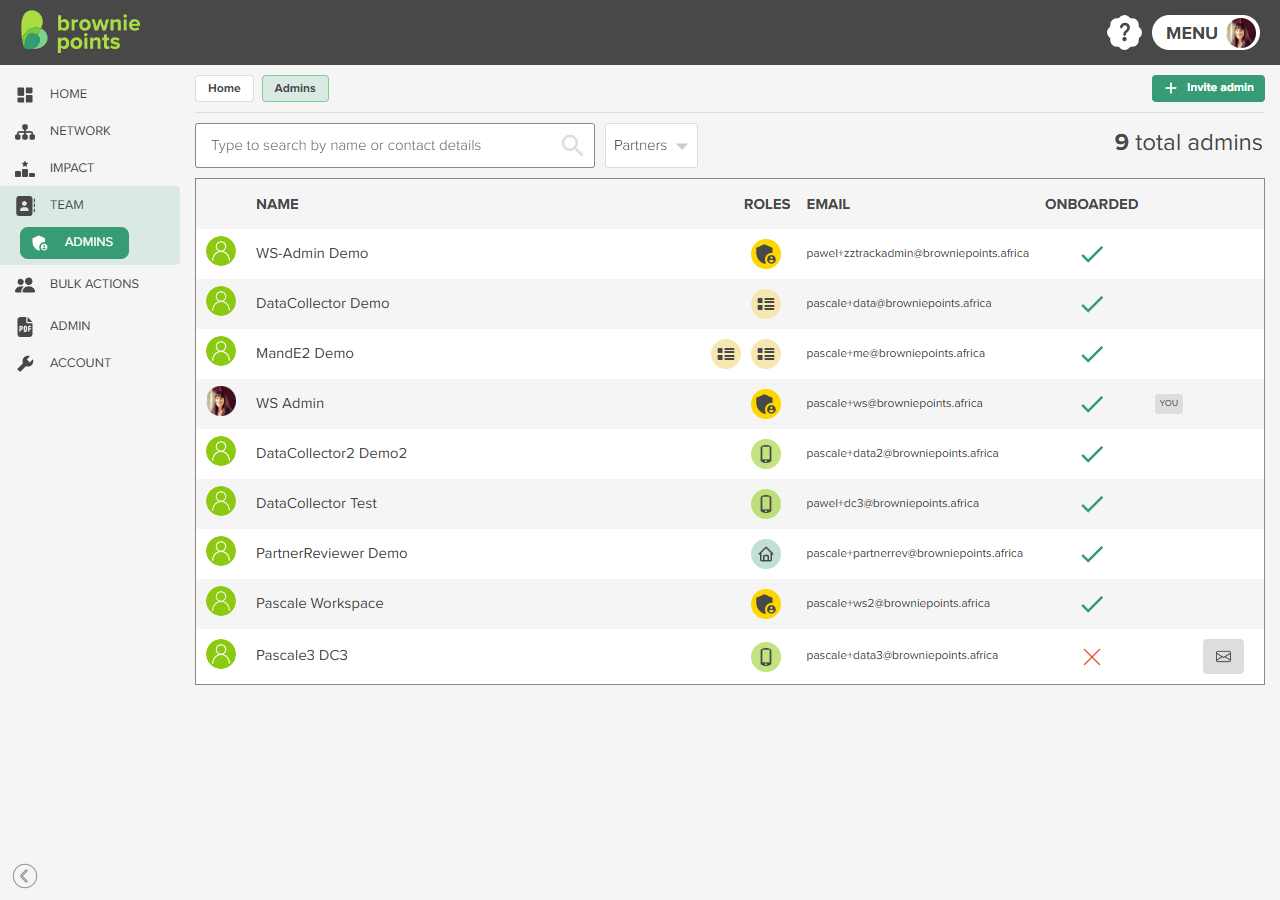
Demonstration workspace. The envelope at the right is for the person with a red cross; people with green ticks already completed onboarding.
Who reviews an output?
Where your SIP has agreed all three review levels in sequence, the order is Worksite Review → Partner Review → M&E Review. M&E Review is the workspace-level review before the agreed Kwantu handover. Your workspace may use fewer levels according to its agreed setup.
SefWorksiteDataStakeholder is reserved for a future stakeholder use case. Do not choose it when you need to appoint a reviewer.
Add a new person or an additional reviewer
Use the steps below only when the person or required role is not already in place.
1. Open invitations
As a workspace admin, open Team → Admins → Invite admin. You should now see “Who do you want to invite?”
2. Choose the right role and scope
- Worksite reviewer: choose M&E Admin under Worksite roles. The next screen says Worksite M&E Admin. Select the correct worksite/locality.
- Partner reviewer: choose Partner Admin. Select the partner organisation. Choose an existing workspace person, or Invite new person.
- Workspace/SIP M&E reviewer: choose Workspace Admin and confirm the workspace. This role also manages the workspace; use it only for the appropriate person.
You should now see the chosen role and the correct worksite, partner or workspace above the person’s details.
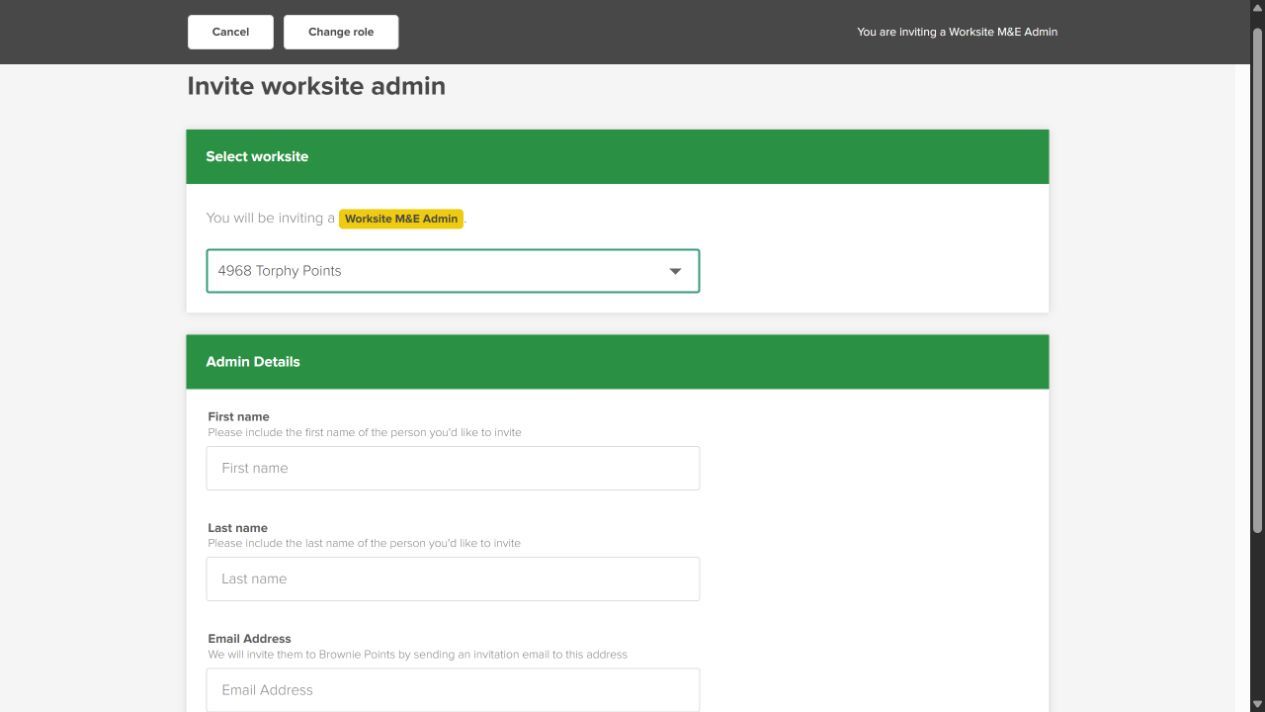
3. Enter the person’s details
Add their first name, last name and email address. Mobile number is optional. Check spelling and scope before sending.
4. Send and check
Use the invitation button at the bottom of the form. For the tested Partner Admin flow, success shows “Person added!” and “We’ve sent an invitation email.” Ask the person to follow their email invitation. Do not share another person’s login.
Ask the person to sign in and check the worksite, partner or workspace they can access. An invitation gives access; also agree who reviews first and who gives final approval.
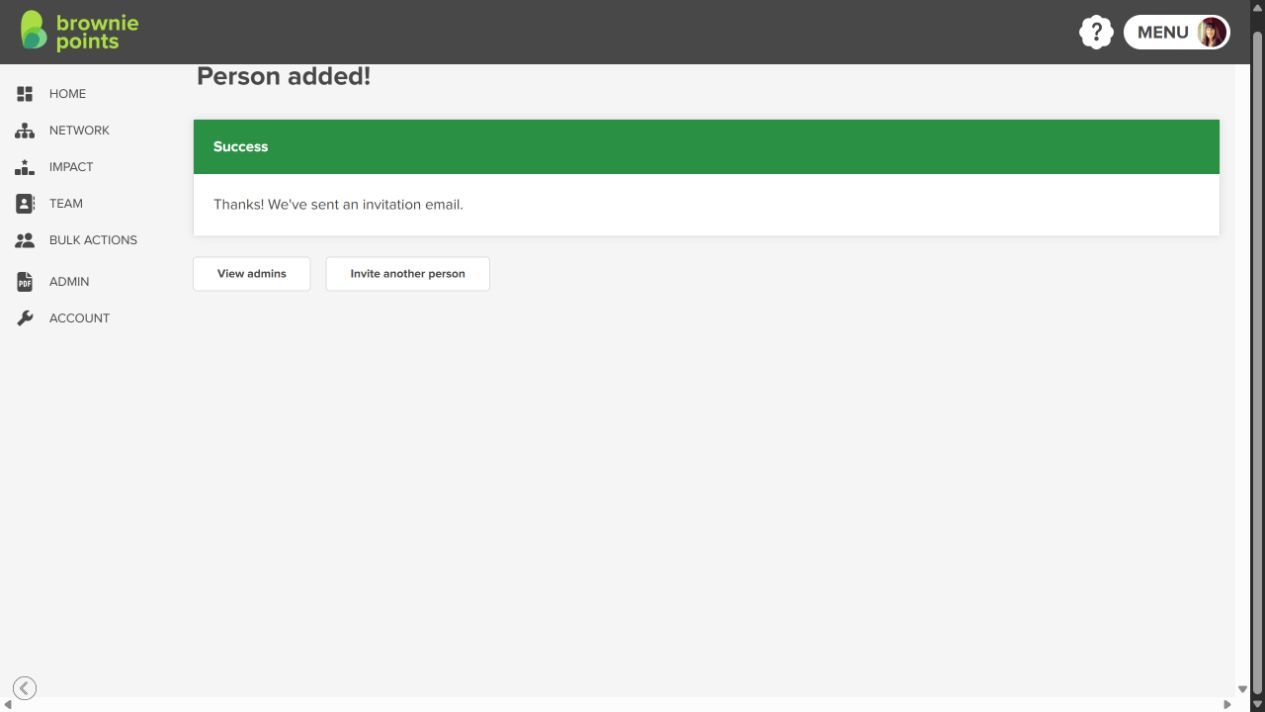
Add a collector who is not already assigned
Choose the Worksite Data Collector role (SefWorksiteDataCollector) and the correct worksite/locality. Add or select the person, check their email and scope, then send the invitation. Do not choose M&E Admin for someone who only needs to capture data.
Personal or shared mobile numbers
Collectors sign in with their own email and password. A mobile number can be personal or shared; it does not replace their individual login. Never share passwords or use another collector’s account.
Before your team starts
Ask each person to follow their invitation and sign in with their own account. Check that they can see the intended worksite or partner. Arrange a practice walkthrough with your collector and reviewers before entering live figures. For a replacement reviewer or a change in responsibilities, contact your workspace administrator to confirm access and any outstanding reviews.
Practise before live reporting
Walk through one practice submission and review with your team. Clearly label any practice record TEST in its description. Keep a note of the locality, indicator, reporting period and person who entered it. Tell Brownie Points which records to remove and wait for confirmation before using those figures for live reporting or syncing them to Kwantu. A TEST label does not automatically exclude a record from totals.
Was this helpful?
Still need help? Ask the team