Capture outputs and evidence
Sign in, submit figures and attachments, check saving and correct a returned record.
Last updated 5 days ago
Watch: capture and submit an output
This short tutorial (1 minute 20 seconds) shows how to sign in, choose your indicator and reporting month, enter a result, add evidence and submit for review.
Play the video here. Turn on the sound to hear the instructions, and pause whenever you need to follow a step. It uses a zero-value test in the demonstration workspace; enter your actual results in your own workspace.
Before you begin
Follow the invitation sent to your own email address, check your details and choose a password. Open Track outputs and check your Locality and reporting period. Ask your workspace admin about missing access.
If your SIP uses its own data system, follow the CSV import guide instead.
1. Open the right indicator and period
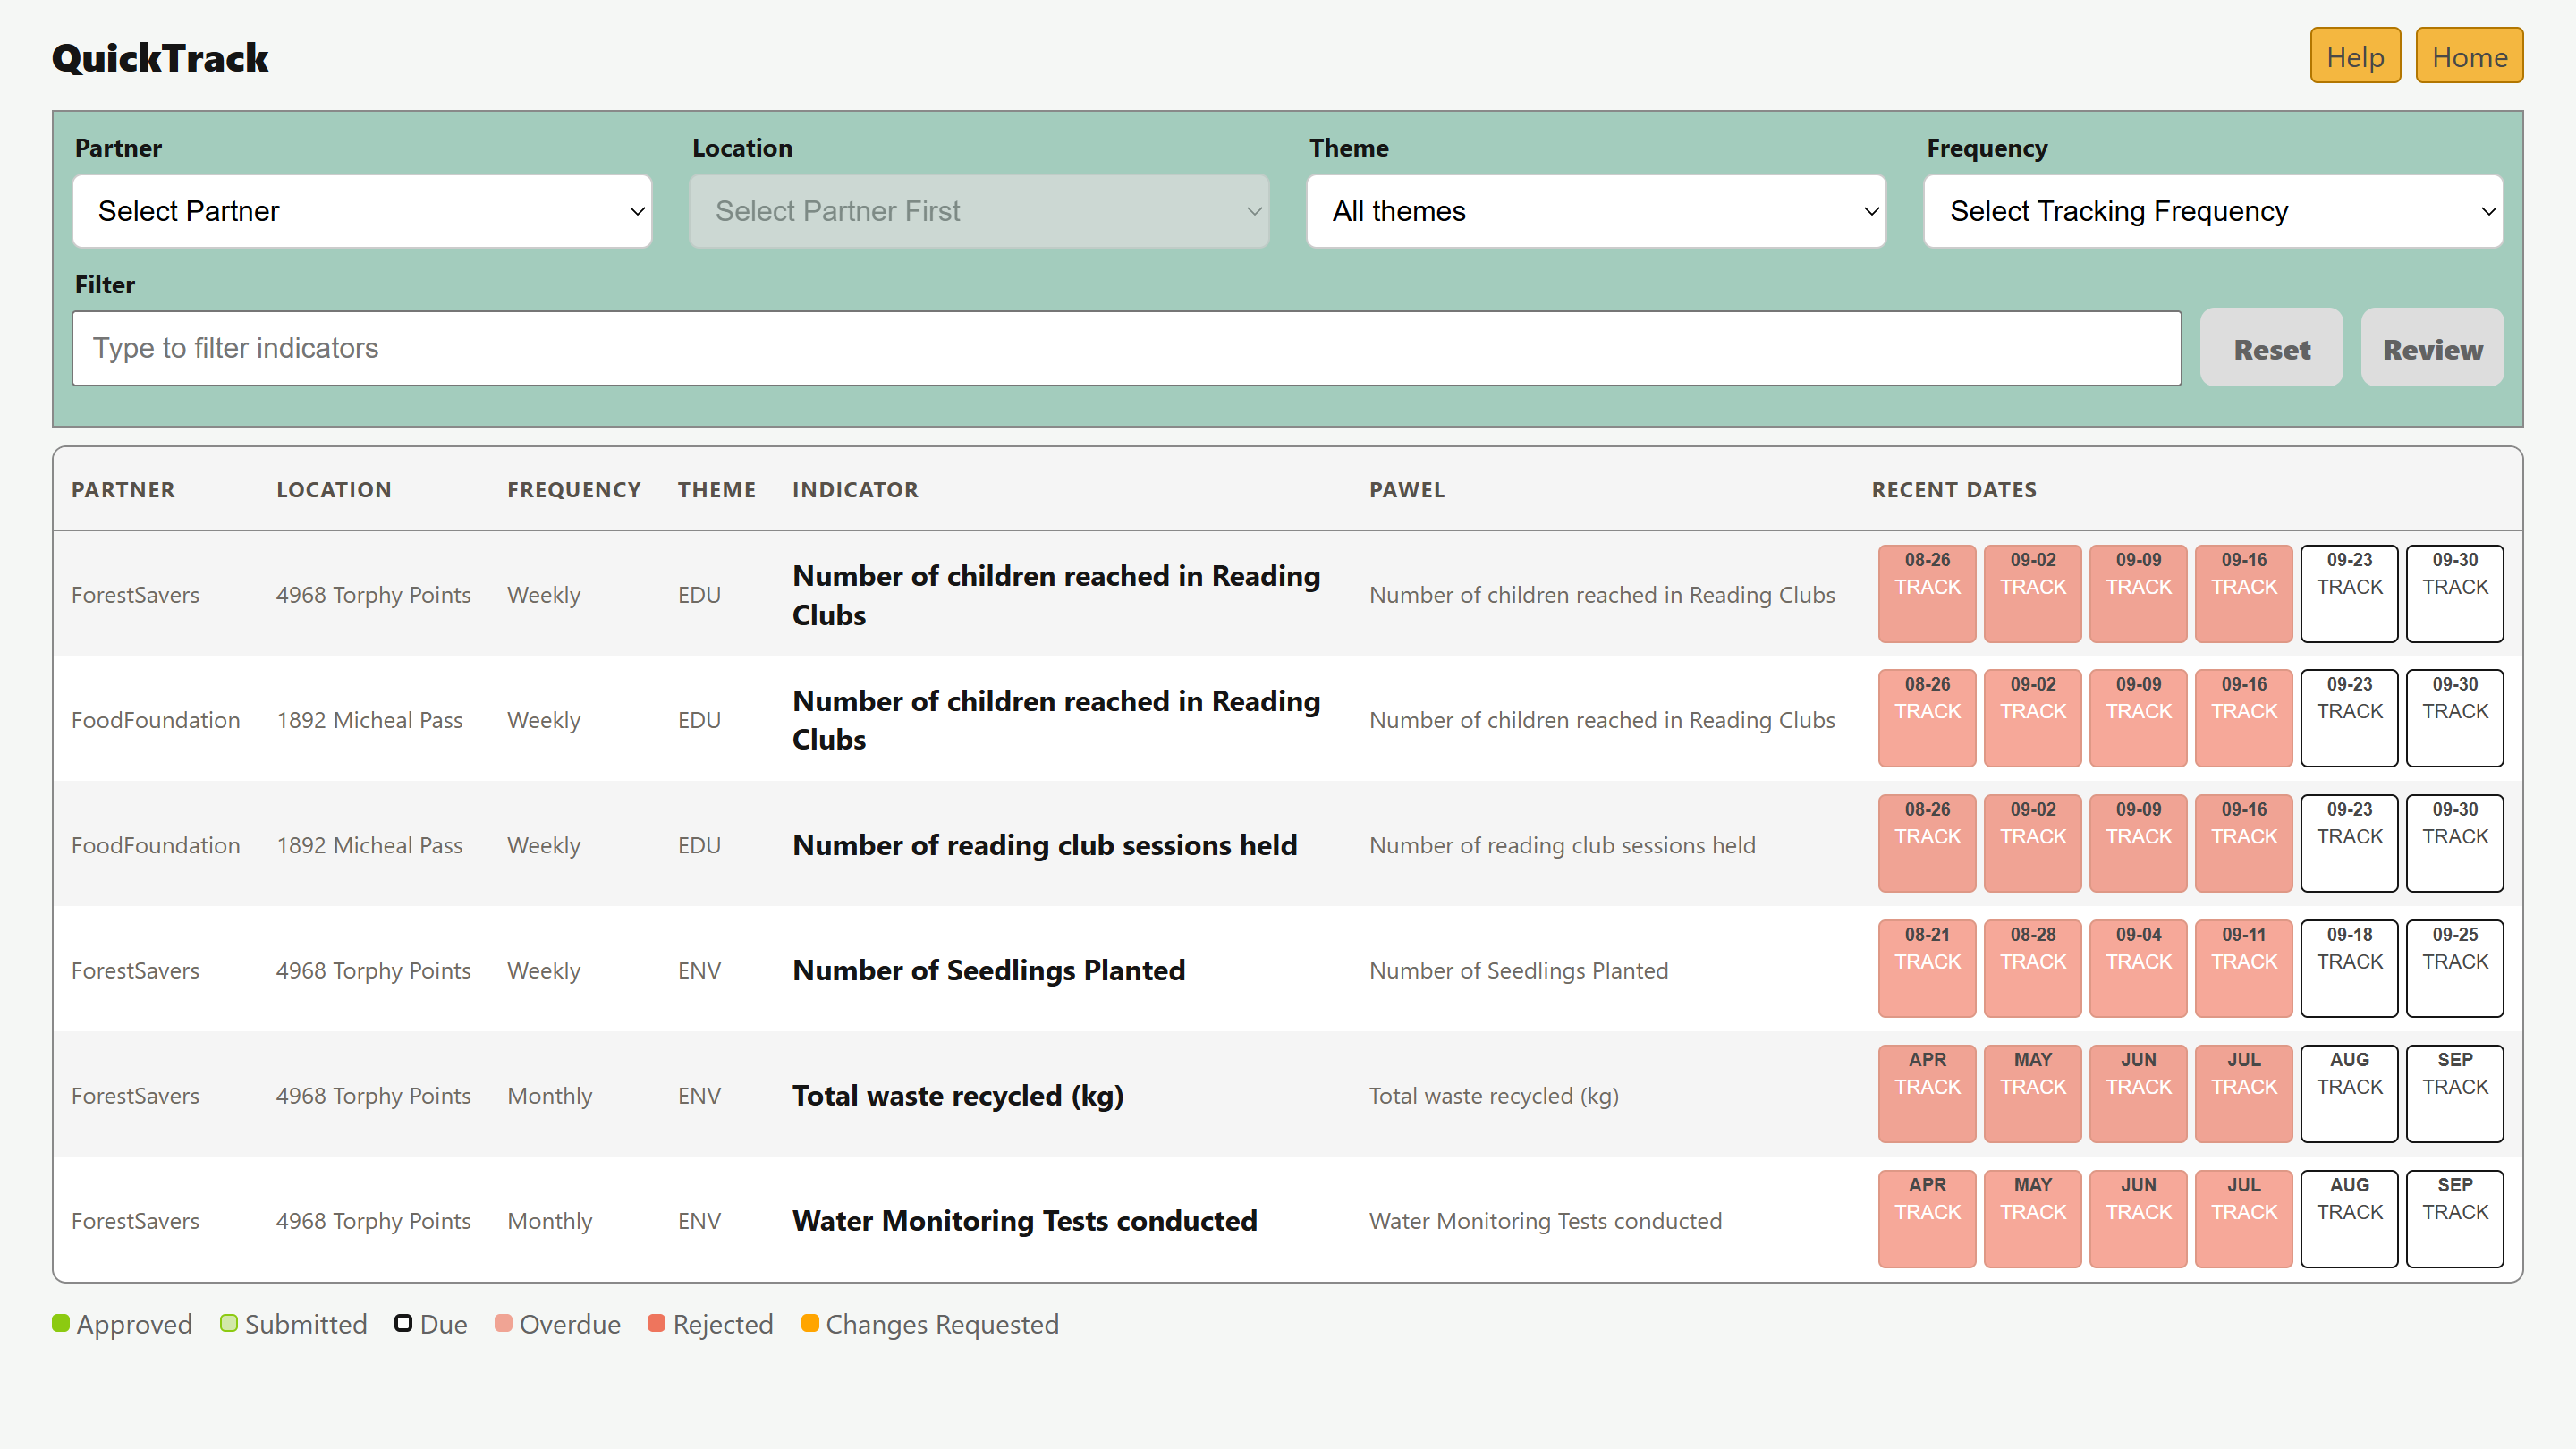
In Track outputs, use the Partner, Location, Theme or Frequency filters. Find the indicator and select Track. Check the form’s Partner, Location and Tracking period.
For November activity, select November even if you enter the figures in December. Follow your indicator’s instructions and agreed calculation rule. Do not count the same activity in both separate entries and a full-month total.
2. Enter the result and evidence
Enter the Output result, a description where useful, and any required evidence or extra answers.
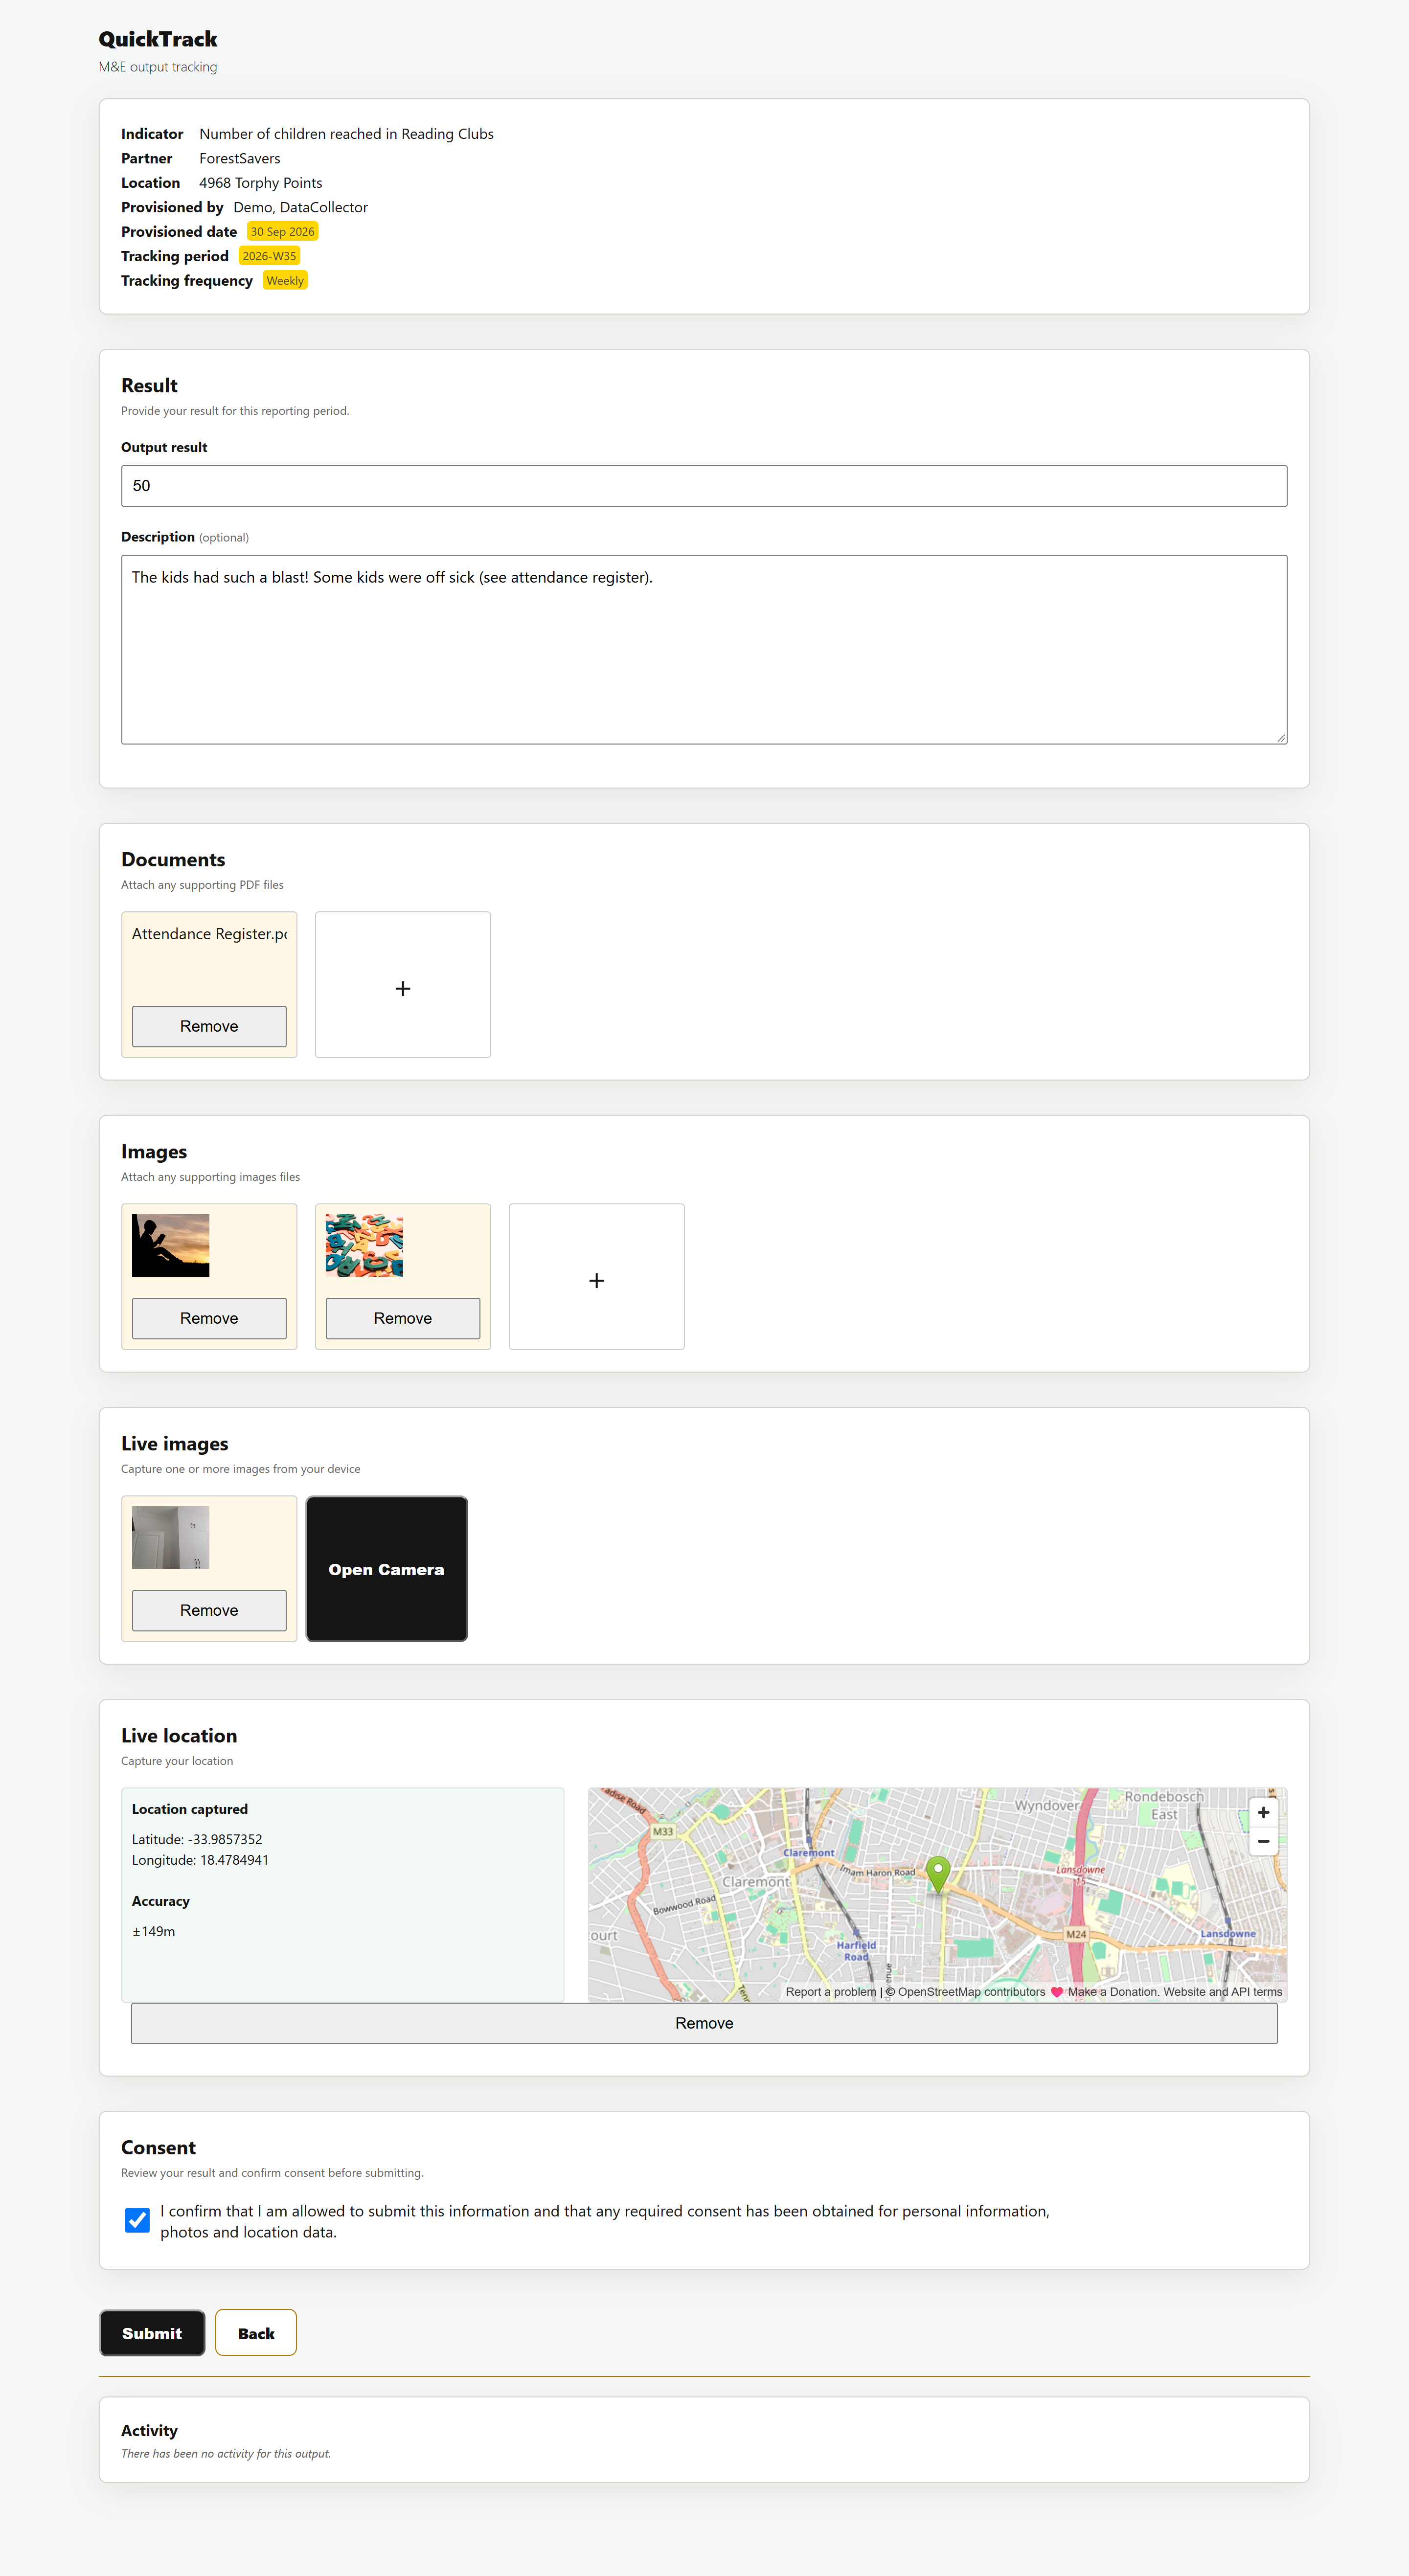
For a PDF, expand Optional Additional Documents. For photos, expand Optional Additional Images. Select the plus sign and choose your files; you can select several images.
You should now see each selected file on the form. Remove any incorrect file. Only tick the consent confirmation if you have the required permission to share the information.
If the form requires camera or GPS access, allow the relevant browser permission on the device you are using. If you cannot provide required evidence, ask your workspace admin for help before submitting.
3. Submit and check it saved
Click Submit once and keep the page open until it returns to the list. Open the saved value and check its result, Submitted by, attachments and Activity.
You should now see a Submitted entry in Activity and a View link for each saved attachment. Open the links to check the files. A submitted record still needs review.
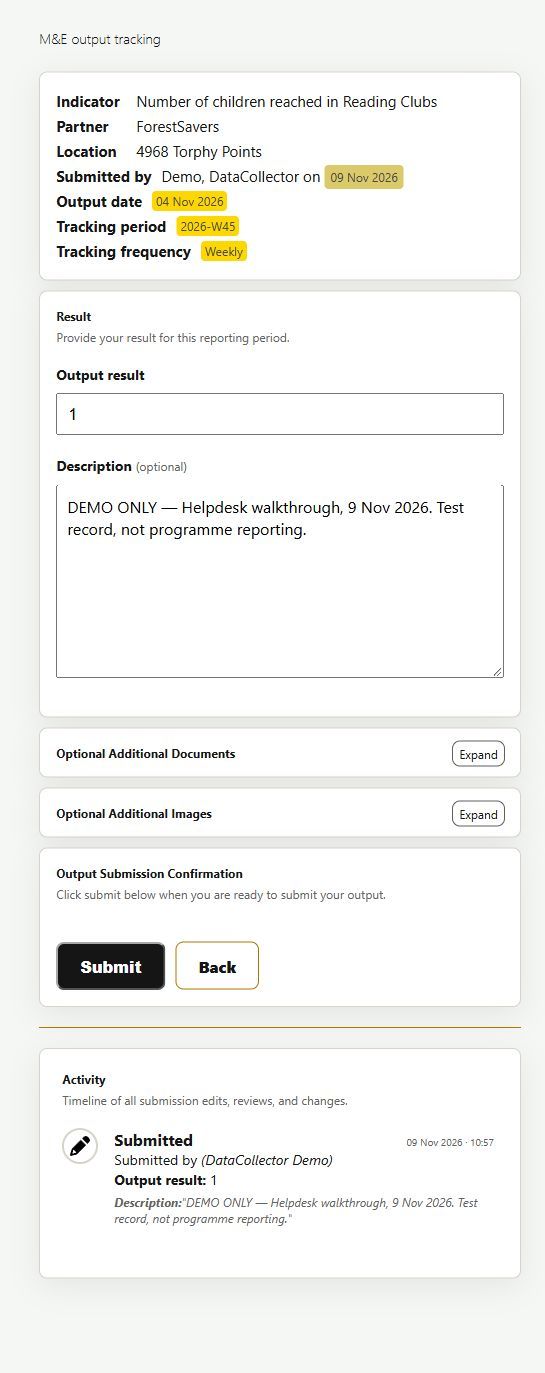
Example from the demonstration workspace; these are test figures.
Correct a returned record
- Open the record marked Requested Changes and read the reviewer’s notes in Activity.
- Correct the same record and click Submit again.
- Reopen it. You should now see Resubmitted and the corrected result.
If the record is Rejected or locked, contact your reviewer. After approval, do not submit the same result again. Ask your reviewer how to handle any later correction.
Sharing collection work
Several collectors can be assigned to one Locality, and one collector can cover several Localities. Agree who submits each indicator and period. Check for an existing result before starting. Another collector’s record may be view-only; ask your reviewer for help if someone needs to take over.
If saving is not confirmed
Keep the form open and a copy of your notes. Check your connection. In another tab, check the saved value, attachments and Activity before trying again. A selected file or spinning message does not confirm a save. Do not repeatedly submit or upload the same attachment.
If the result is still unclear, contact support with the Locality, indicator, period and time. Agree a collection approach with Brownie Points before fieldwork with limited connectivity.
Practising with your team
Label practice records TEST. Keep their Locality, indicator and reporting period, and ask Brownie Points to remove them. Wait for cleanup confirmation before live reporting; the TEST label alone does not exclude them from totals.
Next: your reviewer follows Review submissions and corrections.
Was this helpful?
Still need help? Ask the team